Blog
Step-by-step guide on shopify integration with dynamics 365
16 Jan 2022

Integrate your Shopify store with Dynamics 365 for timely order fulfillment, accurate product availability, and real-time visibility into order statuses!
Follow the steps below and you’ll be ready to get started in no time…
Overview:
Learn how to integrate Microsoft CRM accounts, products, and sales orders with Shopify customers, items, and orders by using Azure portal and Webhooks.
Design:
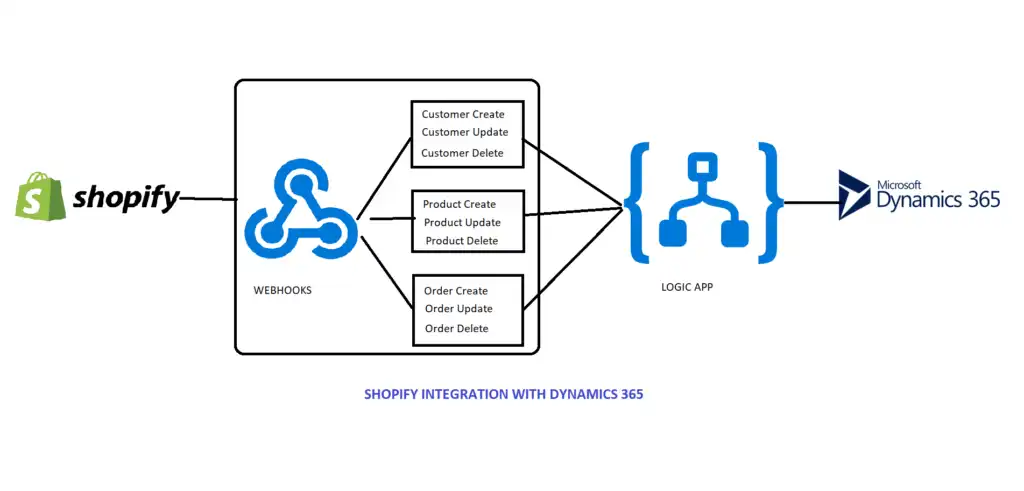
STEPS FOR SHOPIFY INTEGRATION WITH DYNAMICS 365:
For this integration, you will first need to download the Azure Logic Apps.
With the help of this logic apps, you will be able to connect to Dynamics365.
How to create logic apps:
1. First, go to https://portal.Azure.com and create an Azure account. Note: this integration will require an Azure subscription.
2. Next, look up the logic app in the search bar, select the logic app, and then create the logic app as shown below.
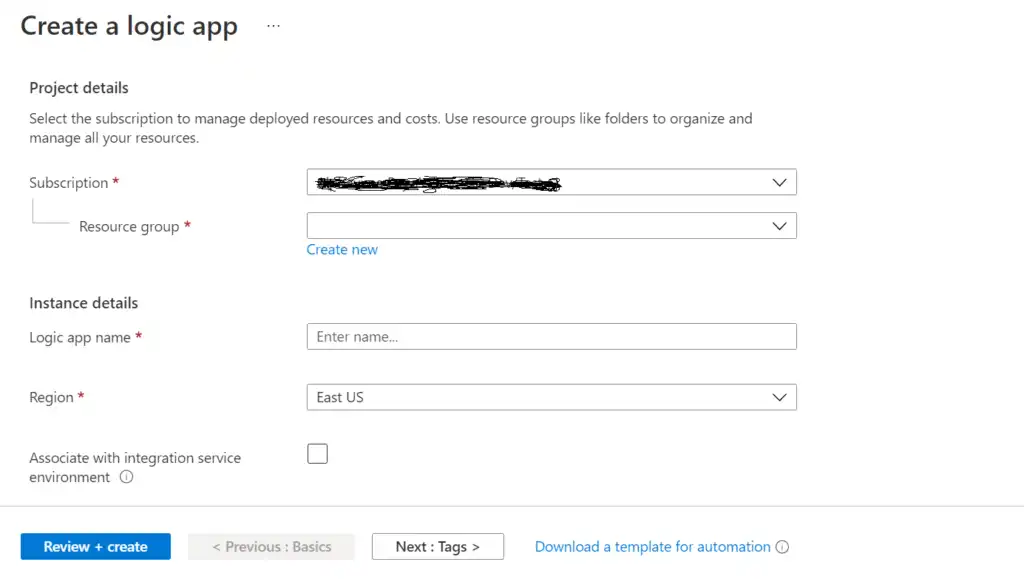
3. While creating a logic app, select Subscription and Resource group (if you don’t have a resource group you can create one) and provide a unique logic app name. Select region and then click on the “Review + create” button.
4. After creating the logic app, next create a Shopify account and Webhooks.
How to create a Shopify account and Webhooks:
1. Create the Shopify “14 days free trial” account at www.shopify.com.
2. Next, create a store in Shopify (which will produce an admin page, as seen below).
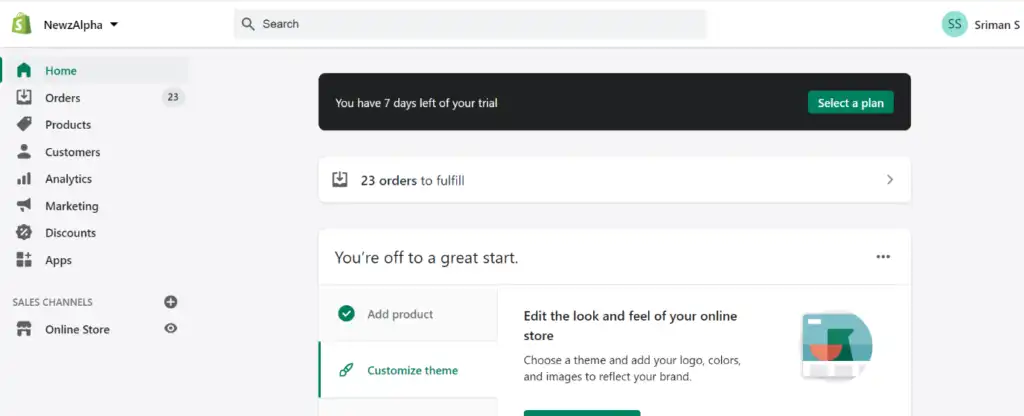
You’re off to a great start! In order to migrate customers, products, and orders from Shopify to Dynamics 365, you will need to create a Webhooks account. To do so, simply follow this schema:
Go to Settings -> Notifications -> Webhooks
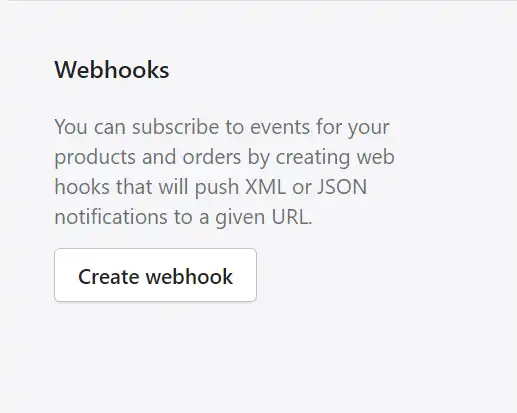
3. After creating a webhook, you can then add customers, products and generate orders by using these products and customers, adding whatever details you like to this store.
4. After inputting the desired details in Shopify, simply click on the Create Webhook button; a popup will display on the screen, and in that popup, select an event. You’ll need to provide the HTTPS URL from Azure Logic app and also select “format” and the “latest webhook API” version, as shown in below.
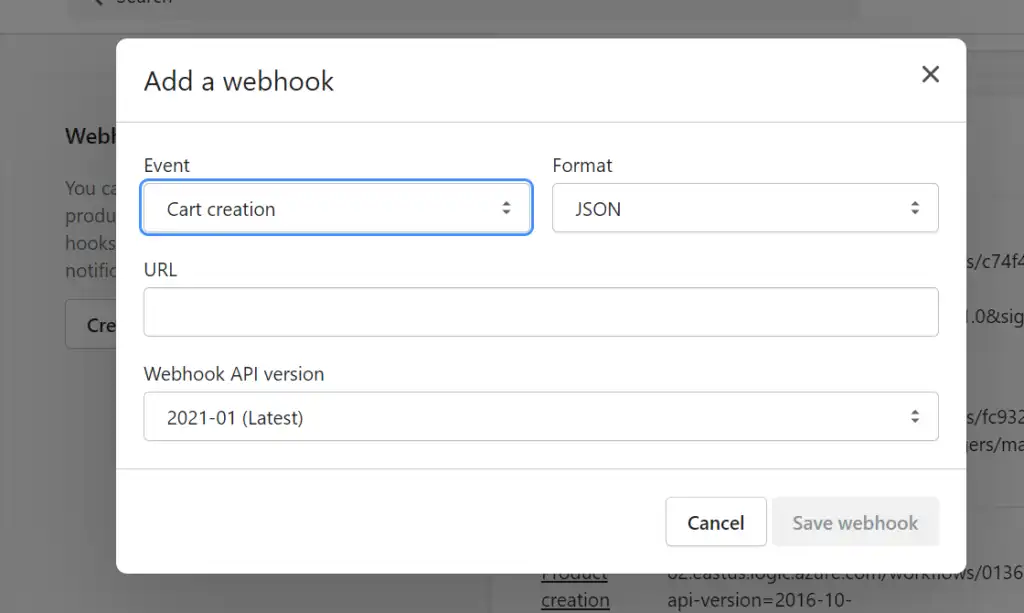
5. When an HTTP request is received, you will need to provide a URL in Azure Logic app. After providing the URL from Azure, click on the save button.
6. This will send notification data to the Logic app, so you can get all details about that event.
7. After completion of Logic app design, just trigger the event in Shopify and see whether it is integrated with Dynamics 365 or not.
Steps for setting up Shopify integration with Dynamics 365:
1. First, you need to create a webhook on Shopify with the event and select the format you want (i.e., either Json or XML). Next, you need to give the URL from the Logic app and then select the latest Webhook API version as shown below is for customer creation event.
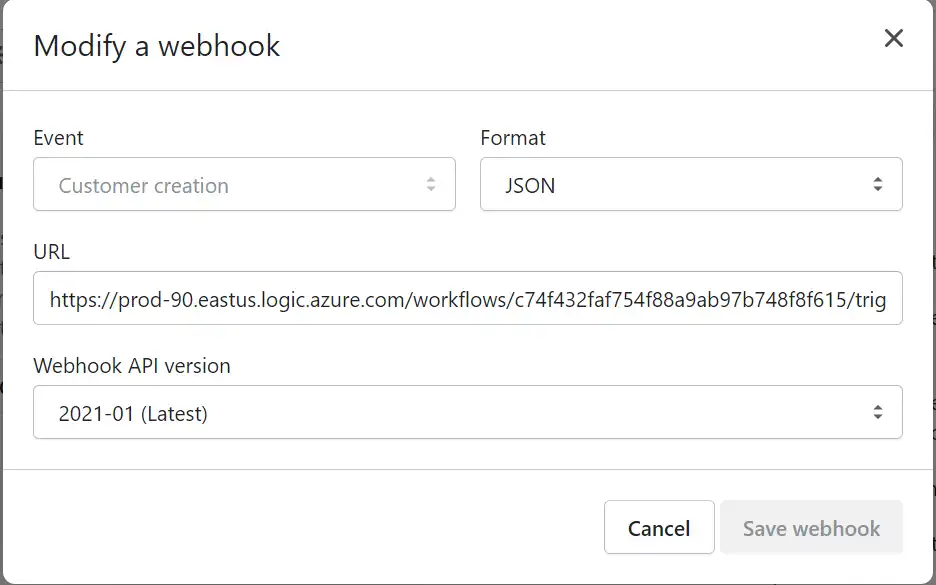
Below are currently available events in Shopify.
| Events | Actions |
|---|---|
| Cart creation | it will send a webhook every time a cart is created |
| Cart update | it will send a webhook every time a cart is updated |
| Checkout creation | it will send a webhook every time a checkout is created |
| Checkout deletion | it will send a webhook every time a checkout is deleted |
| Checkout update | it will send a webhook every time a checkout is updated |
| Collection creation | it will send a webhook every time a collection is created |
| Collection deletion | it will send a webhook every time a collection is deleted |
| Collection update | it will send a webhook every time a collection is updated |
| Customer group | creation it will send a webhook every time a customer group is created |
| Customer group | deletion it will send a webhook every time a customer group is deleted |
| Customer group | update it will send a webhook every time a customer group is updated |
| Customer creation | it will send a webhook every time a new customer is created |
| Customer deletion | it will send a webhook every time a customer record is deleted |
| Customer disables | it will send a webhook every time a customer account is disabled |
| Customer enables | it will send a webhook every time a customer account is enabled |
| Customer update | it will send a webhook every time a customer record is updated |
| Draft order creation | it will send a webhook every time a draft order is created |
| Draft order deletion | it will send a webhook every time a draft order is deleted |
| Draft order update | it will send a webhook every time a draft order has been updated |
| Fulfillment creation | it will send a webhook every time fulfillment is created on the order |
| Fulfillment update | it will send a webhook every time fulfillment is updated on the order |
| Order cancellation | it will send a webhook every time an order is canceled |
| Order creation | it will send a webhook every time an order is created |
| Order deletion | it will send a webhook every time an order is deleted |
| Order fulfillment | it will send a webhook every time an order is fulfilled |
| Order payment | it will send a webhook every time an order has been paid |
| Order update | it will send a webhook every time an order has been updated |
| Product creation | it will send a webhook every time a product has been created |
| Product deletion | it will send a webhook every time a product has been deleted |
| Product update | it will send a webhook every time a product has been updated |
| Refund creates | it will send a webhook every time a refund is issued |
| Shop update | it will send a webhook every time a shop property is updated |
| Theme creation | it will send a webhook every time a theme is created |
| Theme deletion | it will send a webhook every time a theme is deleted |
| Theme update | it will send a webhook every time a theme property is updated |
2. You have to provide the below URL from the Logic app to the above picture URL.
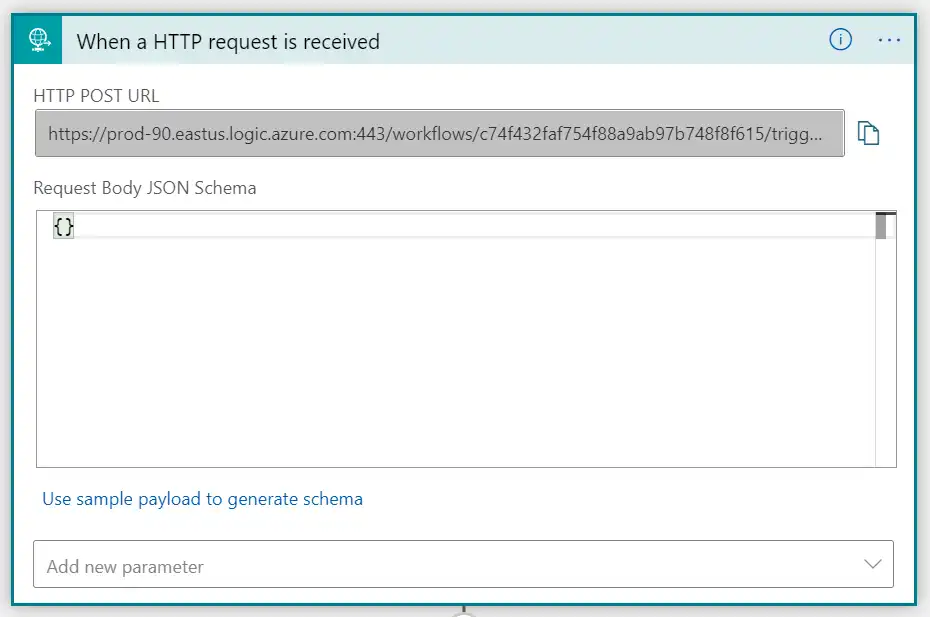
3.Next, you will need to create a customer in the Shopify account.

4. Whenever you create a customer in Shopify, Webhook event will be triggered and send data to the Logic app (see below).
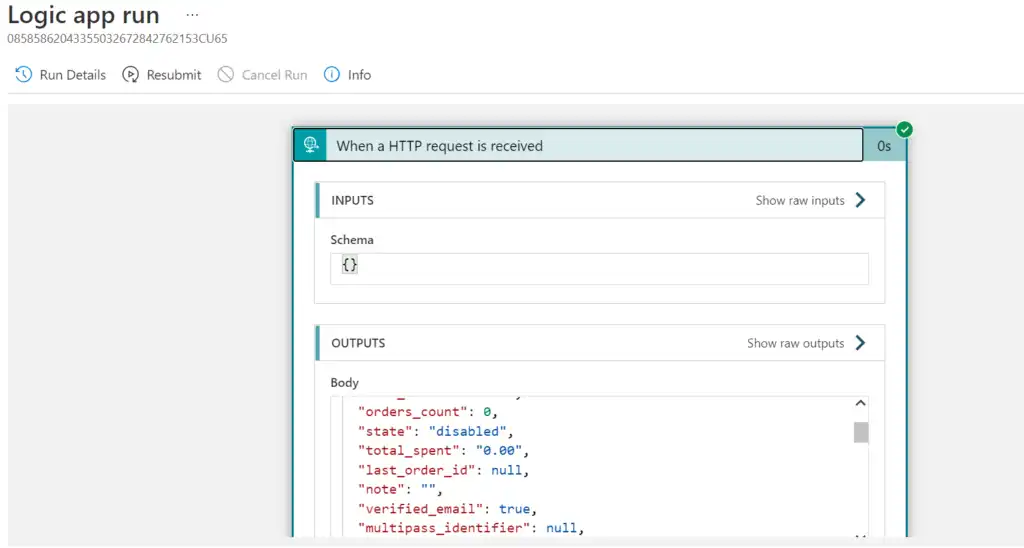
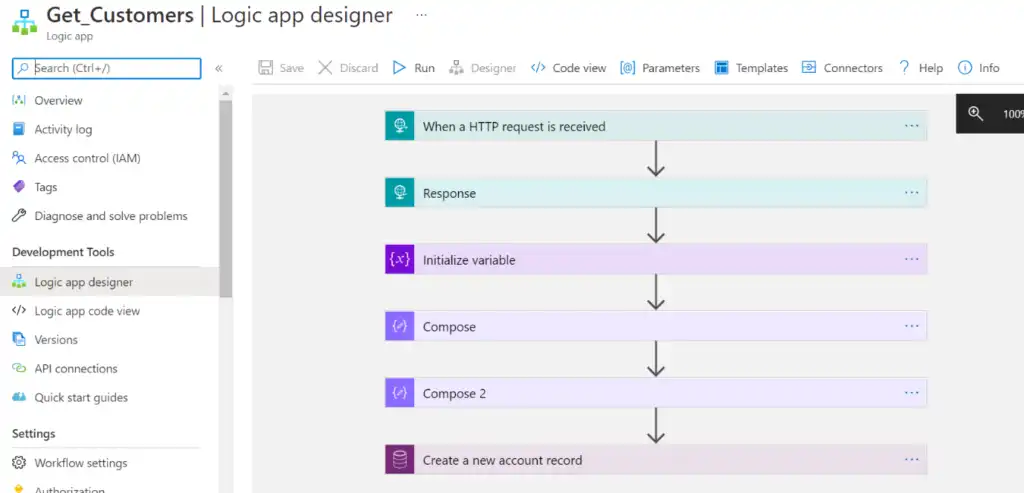
5. If your Logic app is formatted successfully, a record will be created in your Dynamics 365 account as shown below.

